

Accessories
If this is the first time that you will be uploading data to the SIDEREAL Fuse platform you will need to add the drone equipment and accessories that you used for the flight to the platform.
You can do this by clicking on the equipment button that is located on the left panel of the platform shown in red below.
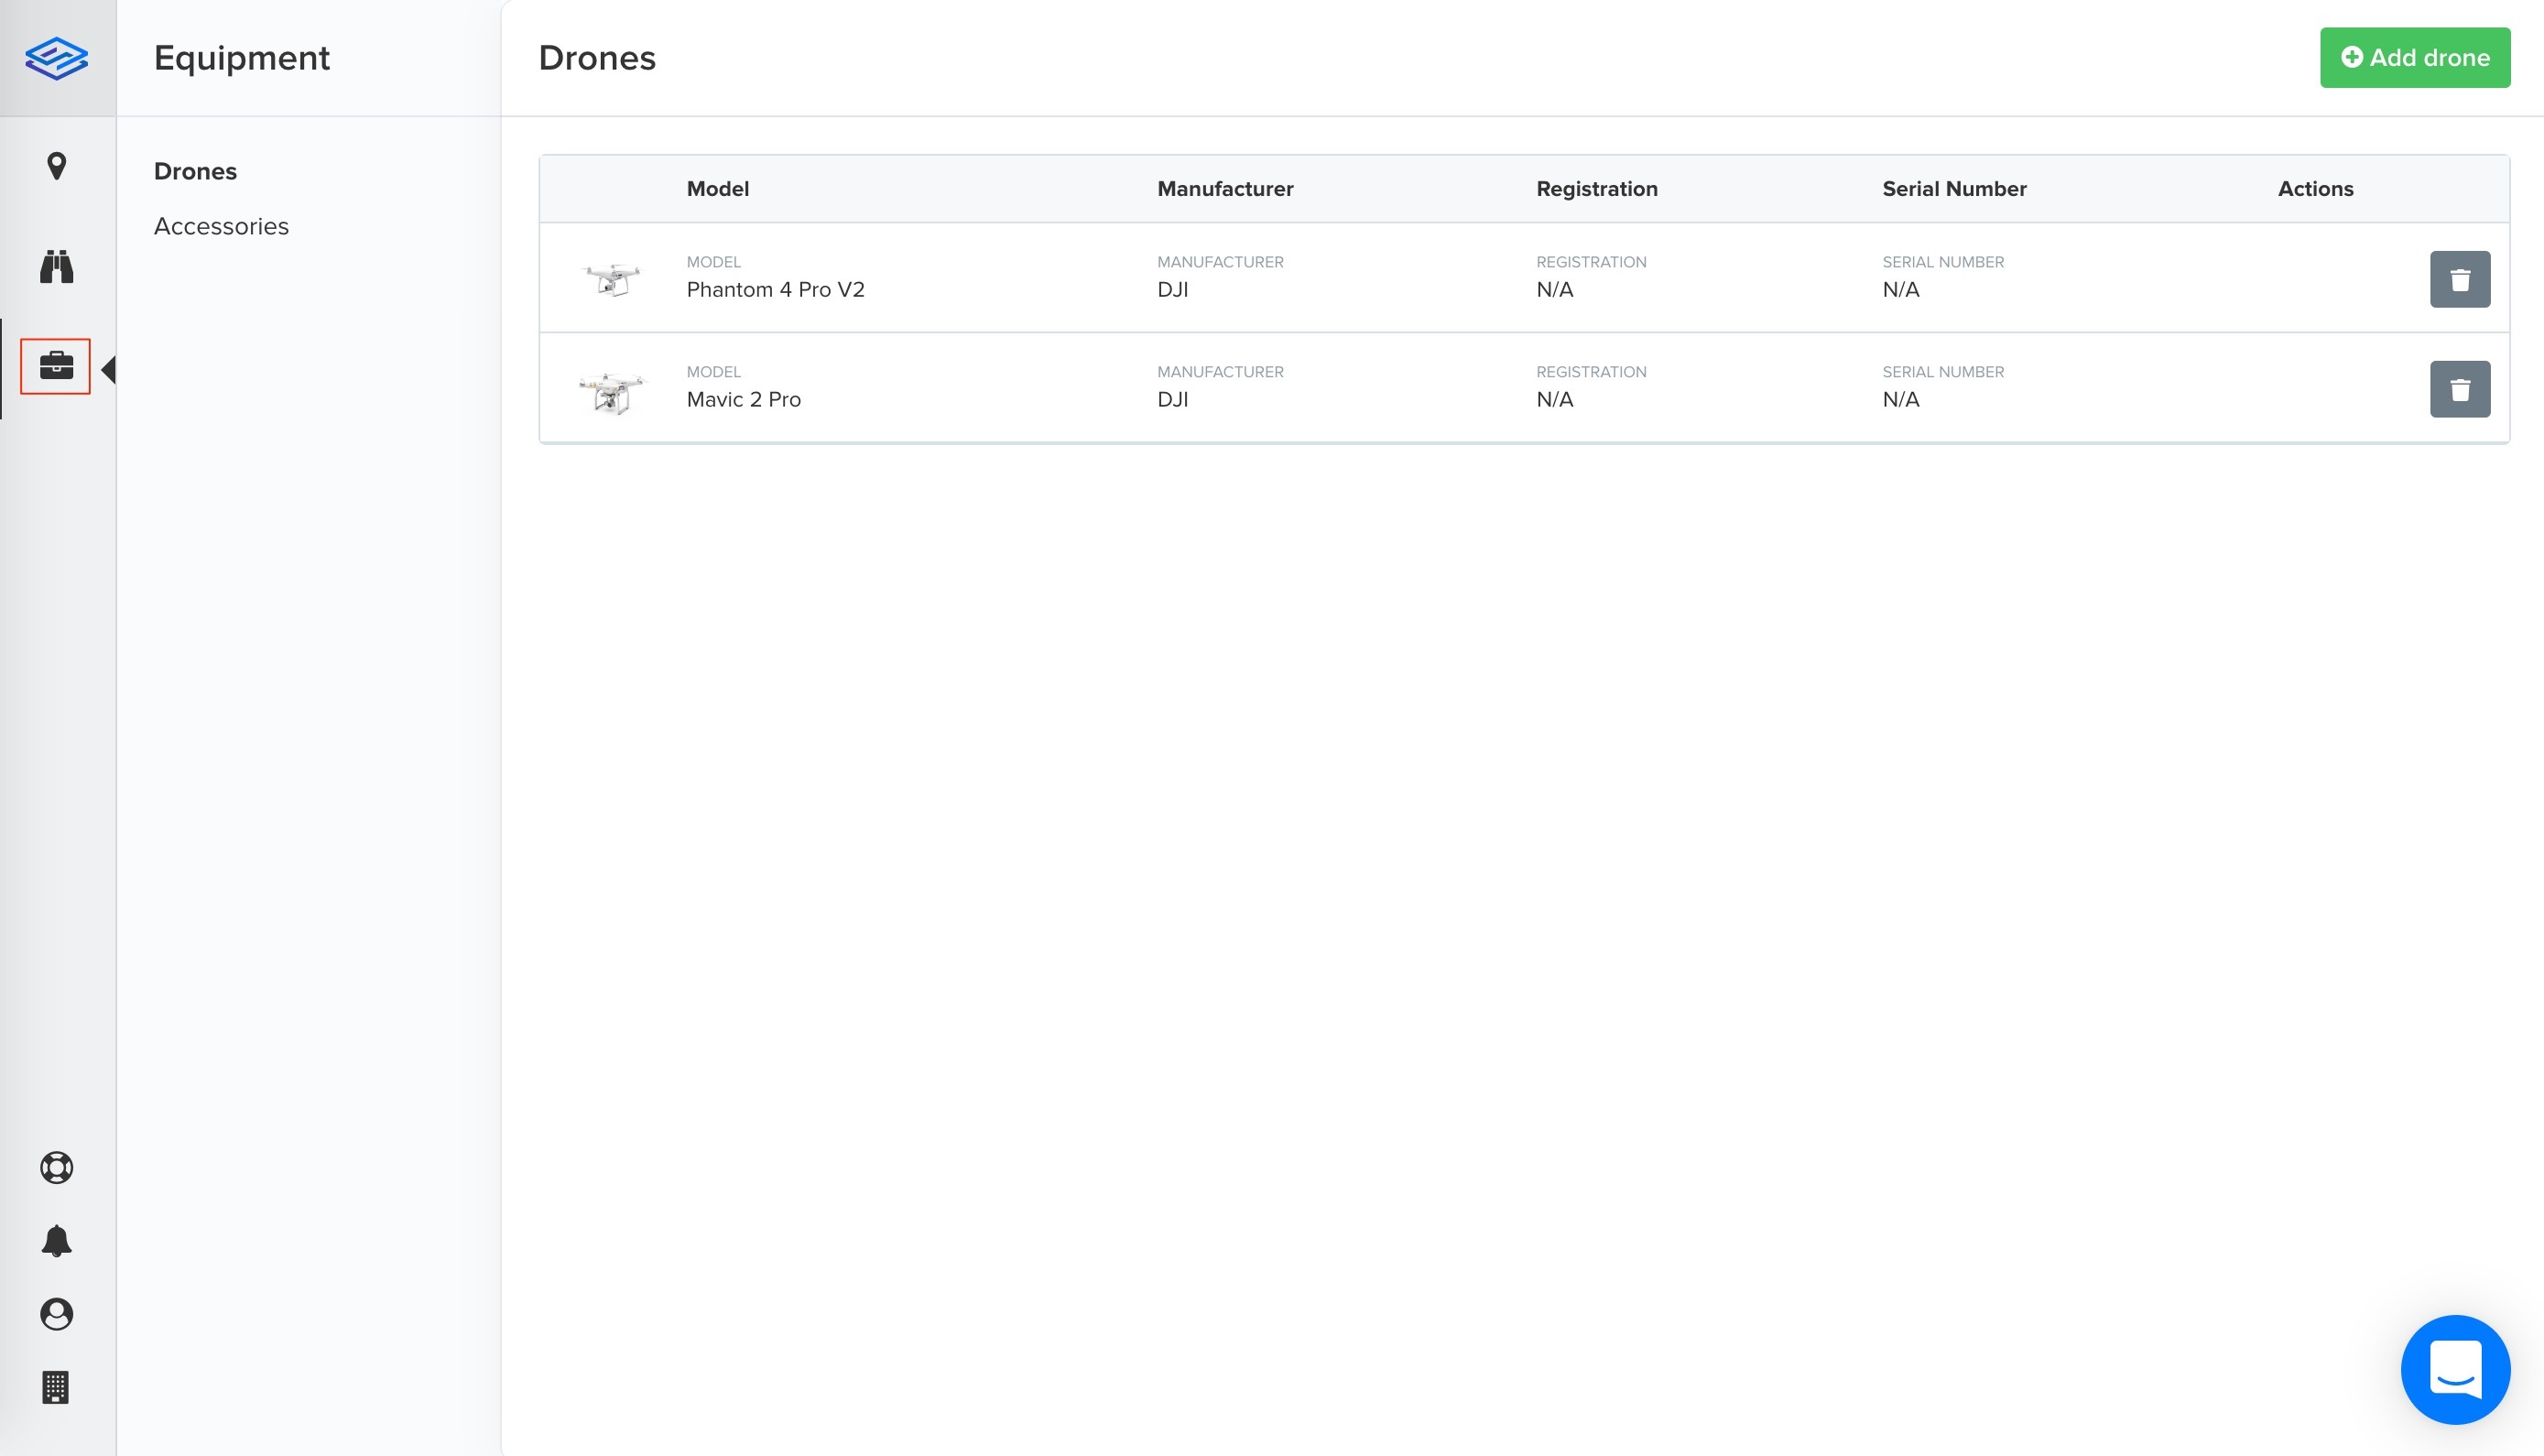
Once you have located the equipment tab, you will need to add in your equipment. First add in your drone that was used to conduct the flight but click the Add drone button located in the top right of the screen.
Next you will need to add in the accessory used for the flight, navigate to the accessory menu by clicking on Accessories on the panel on the left side. You can then click on the Add accessory button on the top right to add them in.
❗️Please make sure that for dual cameras eg. XT2 that you add both the RGB camera and the Thermal camera for this model as shown below.

Assigned
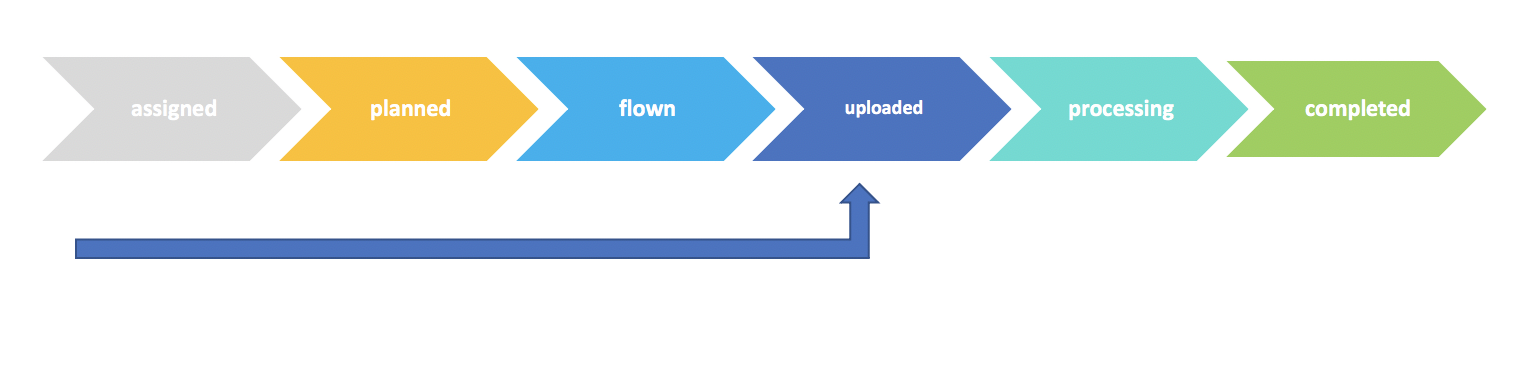
As a pilot or self-flying customer, the first interaction with an operation will be in the assigned status. From assigned to upload status you are responsible for the movement of the operation through the stages.
To progress to the next stage of planning you can click on the operation in the site overview page to be taken to the next step of the process.
Planning the mission
It is time to plan your inspection to indicate the expected flight date of this operation. Below you can see the options that are available to you while the operation is in Assigned.

When you click on the plan flights button shown above you will be redirected to the page shown in the screenshot below. You will need to fill in each field with the correct information before you will be able to confirm the planning.
❗️If you do not select the correct equipment when you go to upload the data the photos will be rejected by the uploader. Please make sure you pay attention to the focal length of the camera you are using (eg 13mm vs 19mm) and also the version of the drone you are using (eg Phantom 4 pro vs Phantom 4 pro V2).
❗️Some drones/accessories are only supported for certain data products. If you see a warning that you do not have a support accessory or drone this will likely be the reason. You can find the full list of support hardware and the supported data products here.
Once you are happy with the information you have entered and it has been accepted by the platform the plan mission button at the bottom of the screen will turn green. If this is not the case, please make sure to check the information you have entered to make sure each field is filled in.

Checking photos
After you have confirmed the planning of the inspection you will be shown the following page.
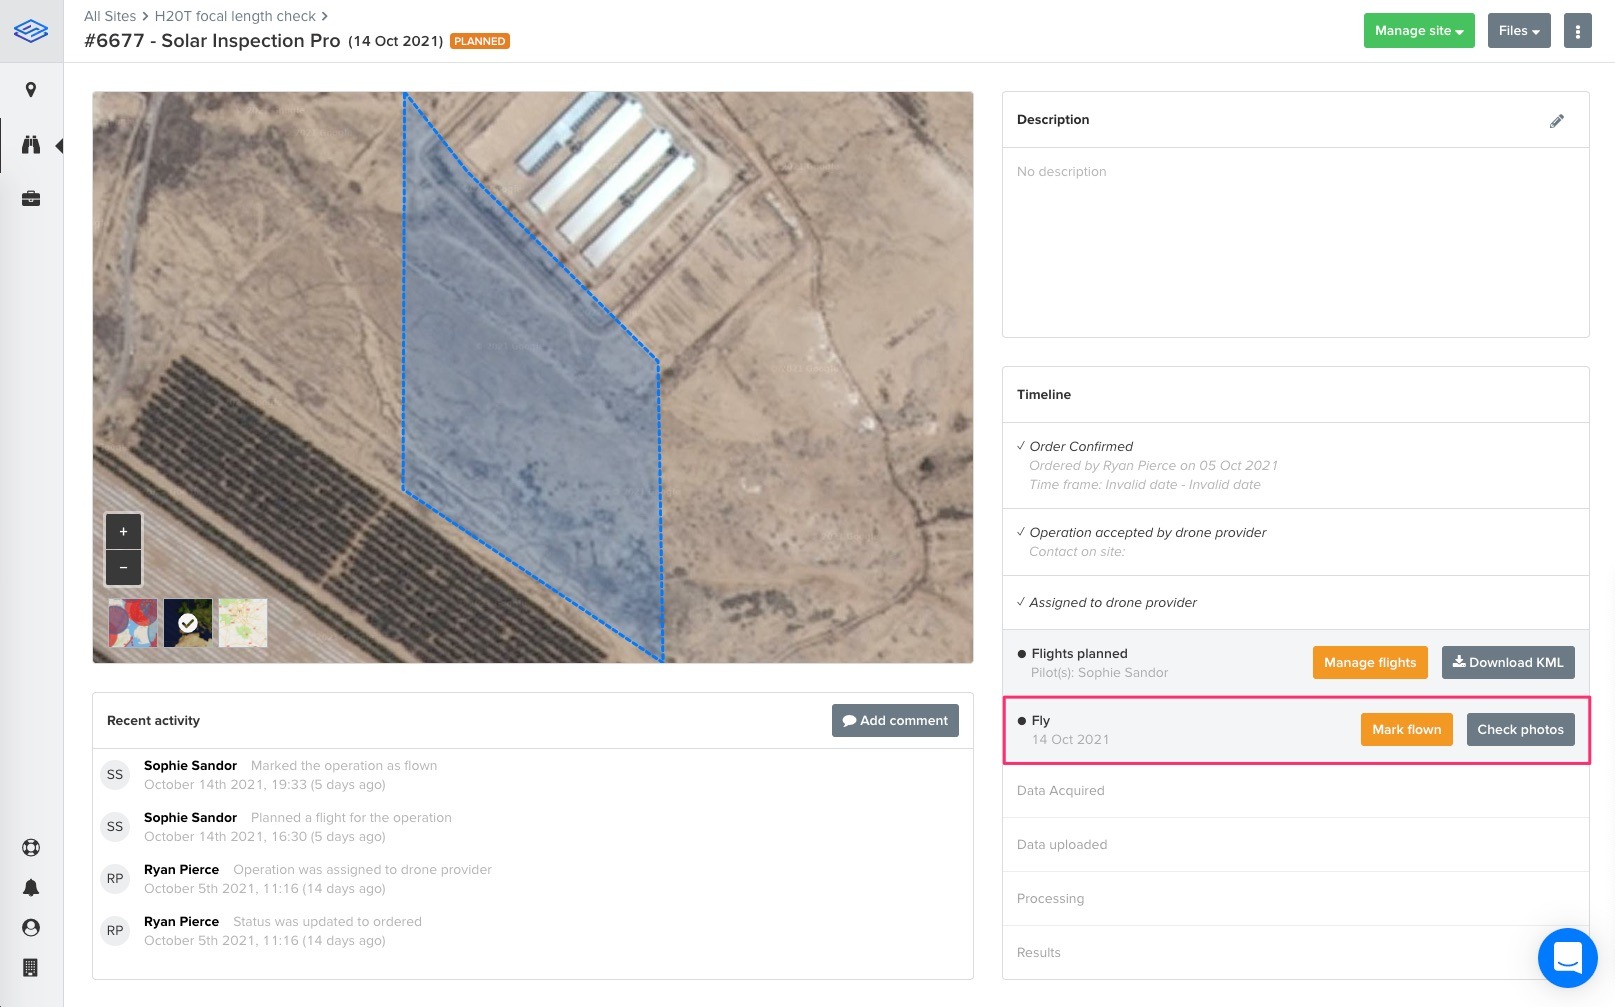
❗️If you are flying the inspection at this time, make sure that you check the photos here before leaving site to make sure that you have full coverage of the flight areas. You can do this by clicking the Check Photos button highlight above. Please note that in this screen you are not actually uploading the photos but just checking the geographical position of the photos.
When you have checked the photos and confirmed there are no gaps in the coverage you can move the operation to the flown status by clicking the Mark flown button shown above.
Uploading data
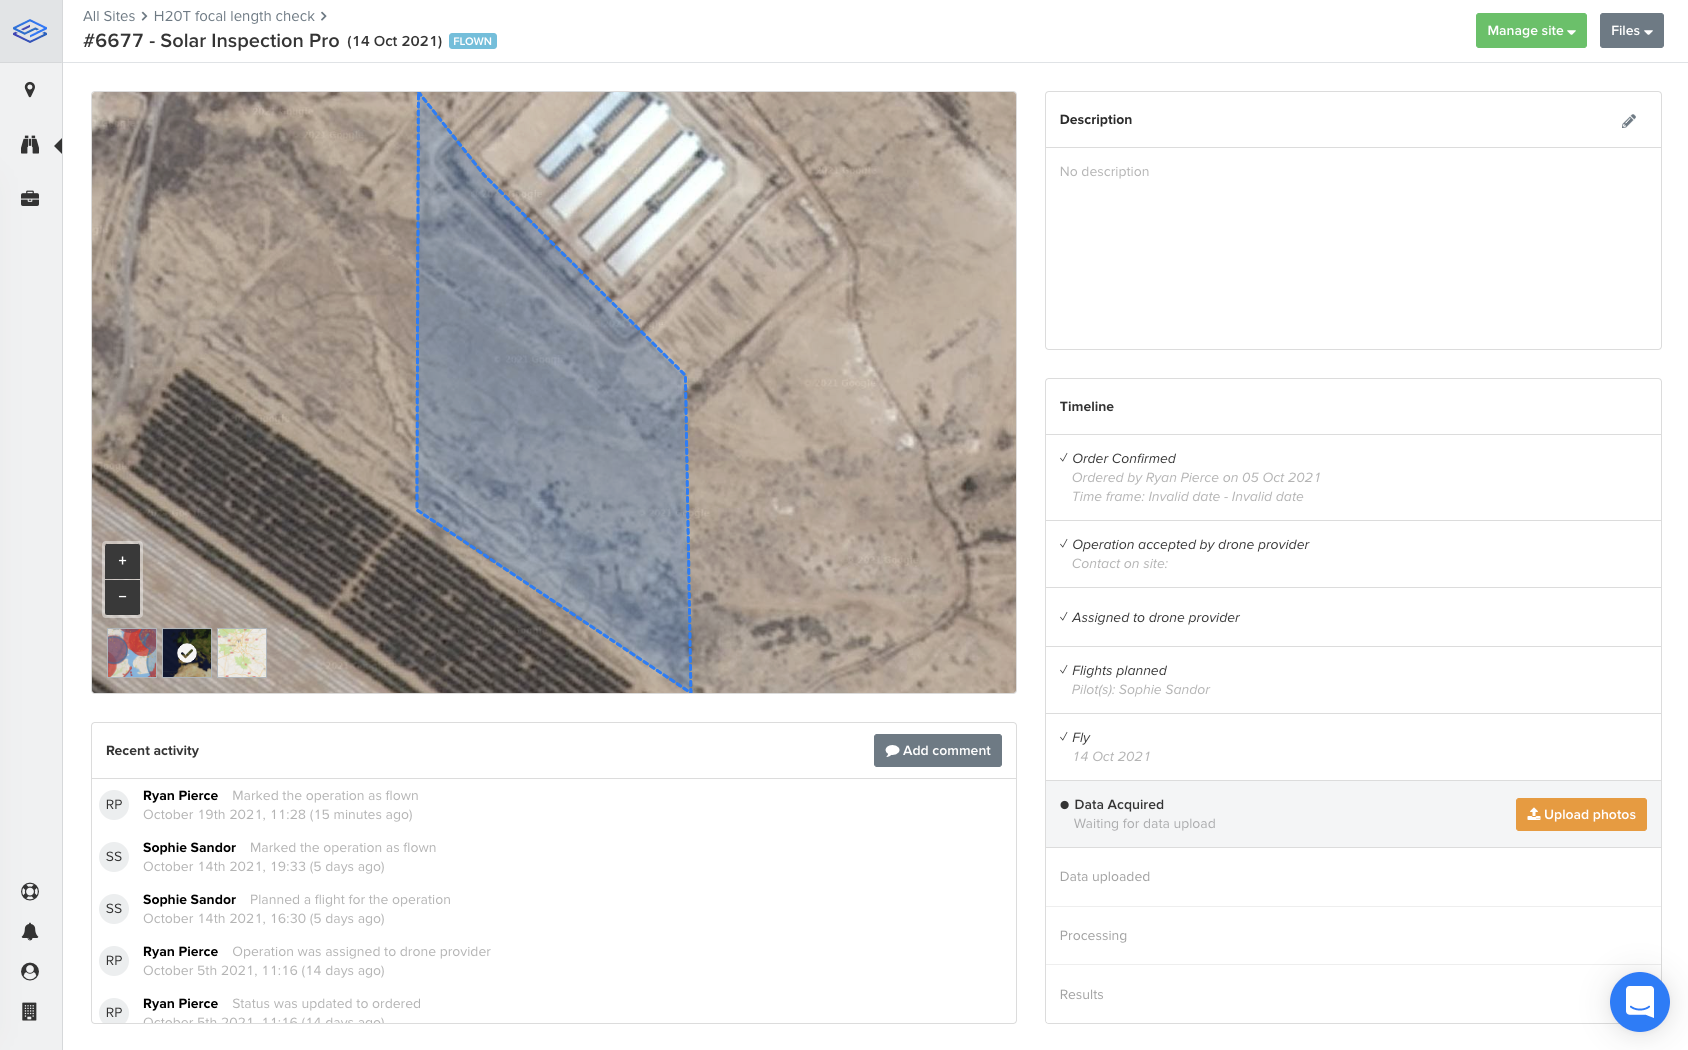
Once the status has been updated to flown you will be able to upload the photos by clicking the orange Upload photos button shown below.
❗️The upload should be completed on one tab to avoid duplication issues while uploaded.
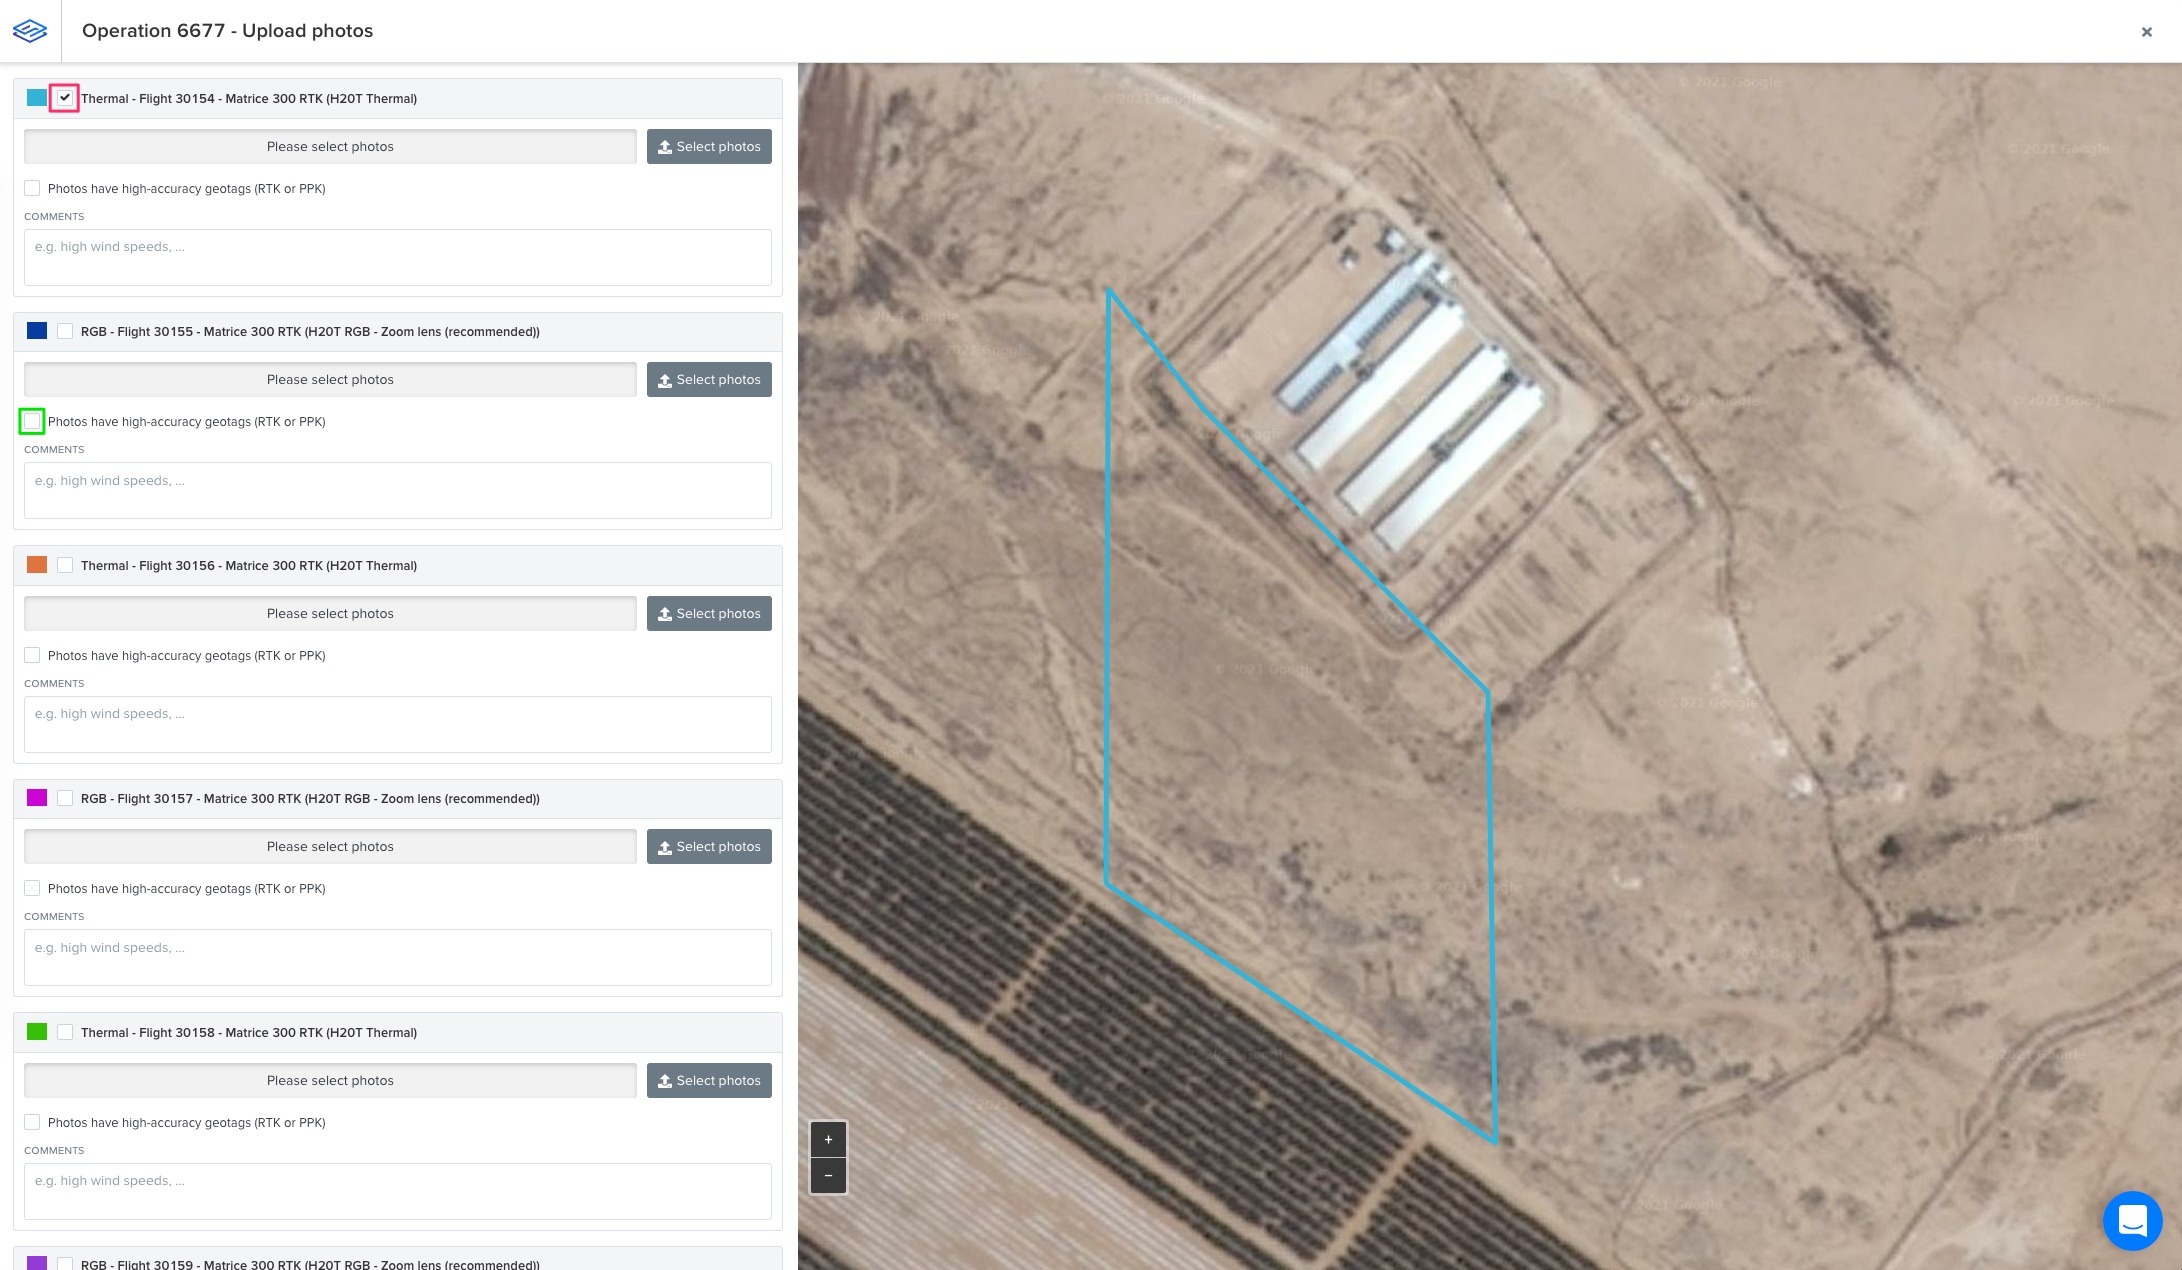
💡 Tip:
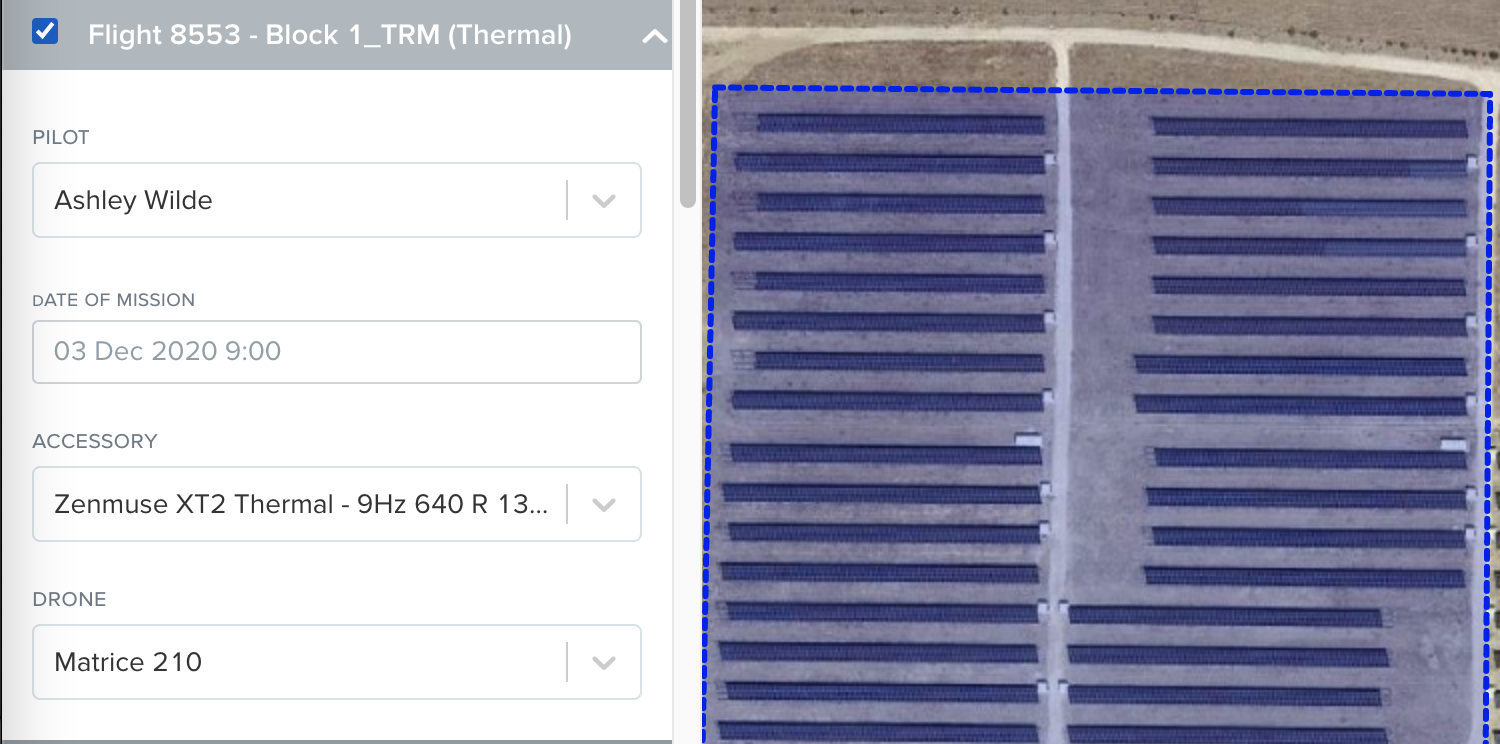
You can click on the check boxes shown in pink below to display the flight area for the block that you are uploading to. This can help identify the correct area that you are uploading to.
If you have flown an inspection using either RTK of PPK you can indicate this by checking the box highlighted in green below.
Validation checks
When uploading data to the platform there are a number of validation checks carried out to ensure that the correct data is being uploaded to the platform.
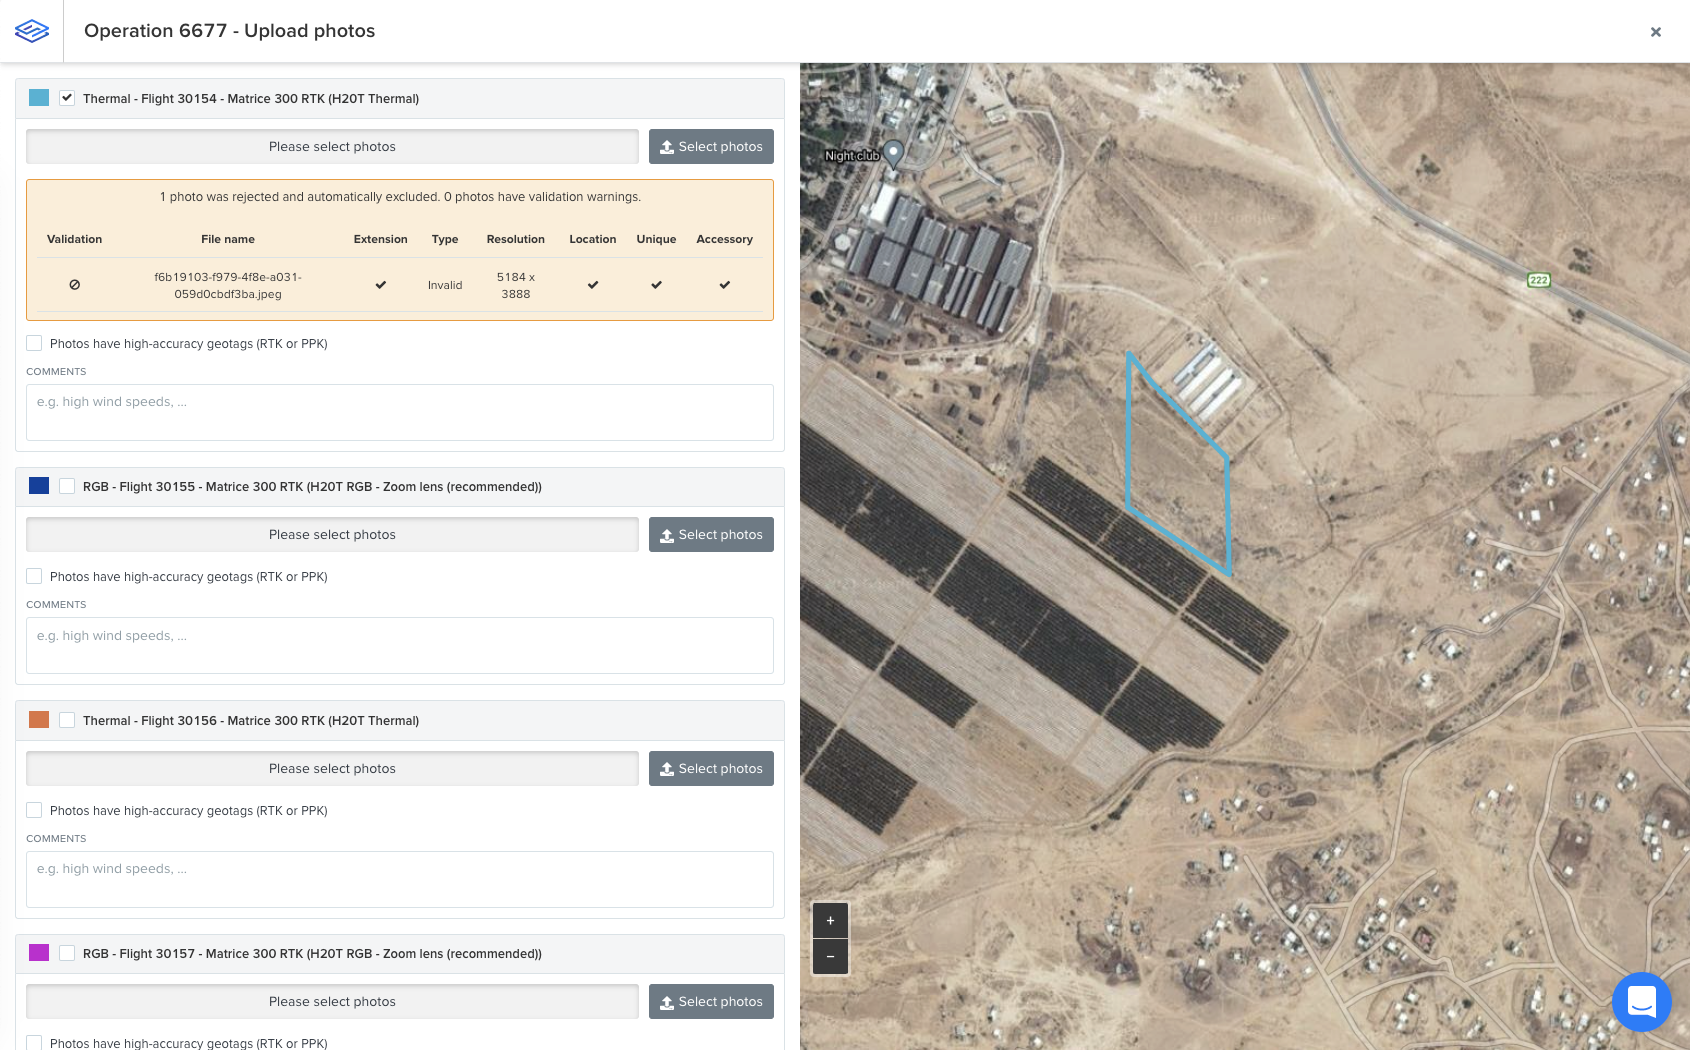
In the example below, an RGB photo was uploaded to the Thermal flight of this block so it has been rejected. You can see the details of the why each photo was rejected in this validation overview shown below.
❗️If your photos are being rejected when attempting to upload, please make sure to check here to understand why.
There are a number of checks that the uploader carries out to make sure that the data being uploaded is correct. These checks include:
Duplicates
File extension
Data type (RGB, Thermal, Multispectral)
Resolution (width, height)
Location
Camera model
Focal length
Uploaded
Once all images are uploaded, SIDEREAL will then perform the Quality Check on the data to ensure that the data is suitable. If it passes the Quality Check we will go ahead a process the data without any further contact. If the data fails the quality check process you will be sent an overview of why the data has failed as well as the recommendation on how it can be fixed.
If this is a Solar Construction operation that you have flown yourself you will also need to tag the GCPs and push the operation to processing. You can follow this support article on how to do so.