

Prerequisites
An operation that has all photos successfully uploaded (operation status is 'Uploaded')
A list of the coordinates of your ground control points
EPSG code of the projection in which these ground control points are recorded (for information of the EPSG code for your local region see www.epsg.io )
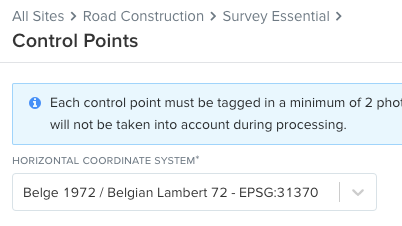
Set the Coordinate Reference System
Go to the uploaded operation that you would like to tag the GCPs in, and click on the button "GCP's" at the right top

Update the coordinate reference system (CRS) to match the coordinate reference system of your ground control points. By default, the CRS for the ground control points equals the CRS that was selected during creation of the operation. Updating the coordinate system here, will update the coordinate system of the operation. Once data has processed, the data will be visualized in this coordinate system as well as the available downloads
Provide GCP information
There are 2 options to upload the GCP information into the platform. You can either enter the information into the system manually one by one or upload a file (.csv or .txt) with the information using the "import from file" button on top. You can also download a template for the import from here as well.
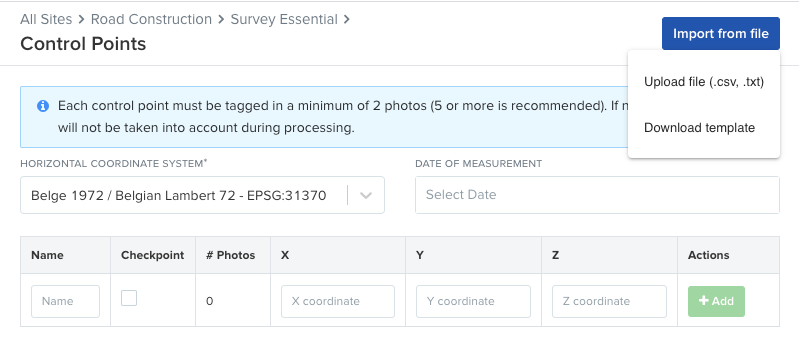
X: Longitude
Y: Latitude
Z: Elevation
If the information has been entered correctly (making sure you have also selected the correct coordinate reference system) the GCP marker should show up in the correct location on the map.
Tagging the ground control points in photos
The first step to tagging GCPs is selecting the GCP you want to start linking photos to. To do this, first click on the GCP marker on the map (it should then turn blue and white to indicate it's been activated) then select one of the photo markers on the map to begin locating the GCP within the photo.
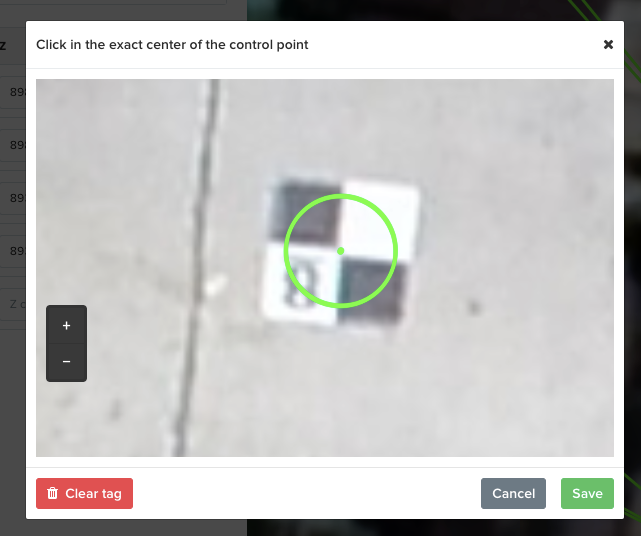
When the photo has been successfully linked there will be a green line connecting the photo marker to the GCP marker.
The GCP needs to be tagged in a minimum of 4 photos, however we recommend that you tag it in at least 5 to get the most accurate results.
Once you have finished tagging all the GCPs, go back to the operation menu and click Process which will start the processing of the data. You will receive an email notification once your processed results are available.

Frequently Asked Questions
I have entered/imported my GCP's but don't see them appear on the map
Most likely this is caused by a wrong coordinate reference system. Ensure you have selected the correct EPSG code.