
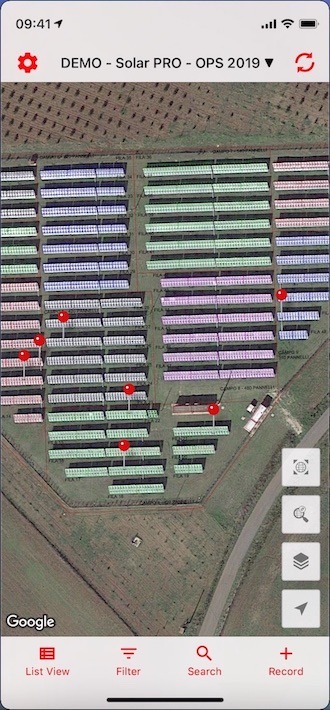
Once your form (which is called App in Fulcrum) and your data has been synced to your mobile device, you can begin to collect and edit data from your assets in the field. As you can see below in the picture, each object is a pin on the map. Fulcrum terminology talks about a record. Each pin on the map represents a record. When you open a record, you will notice that it contains a number of fields. In this article, we will show you how to create a new record, edit an existing record, and touch on a few of the advanced features and functions.
If you want to first familiarise yourself with the Fulcrum field app on your mobile device, you can refer to the iOS and Android articles on the Fulcrum online help section.
Creating a New Record
When you are in the field and you observe something that you would like to report later, you can create a new record in Fulcrum. Creating a new record in Fulcrum is as simple as tapping on an icon and then entering the data.
Each time a new record is created the record’s location is captured from the device’s built-in GPS sensor or from an external GPS that is paired to your mobile device. The location can also be set manually on both iOS and Android devices. Additionally, the record also captures data for several other metadata fields such as the timestamp and the user that created the record. More information on the captured meta-data can be found in the system fields article on the Fulcrum online help section.
To create a new record, tap on the create new record icon (+) on the bottom right corner of the menu bar.
This will create a new record at the device's current location. Once you have completed entering in the values for the new record, tap on Save in the top menu bar to save the record.
Editing an Existing Record
To edit a record you must first locate the original record. Searching for a record can be done from either the map view or the list view. For example, when you have pushed solar panel anomalies to the Fulcrum field app, each anomaly will be represented by a record and in this case you can find the specific record by looking for the anomaly ID number.
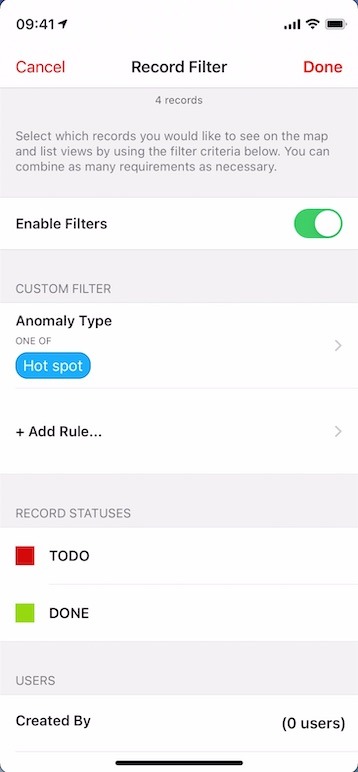
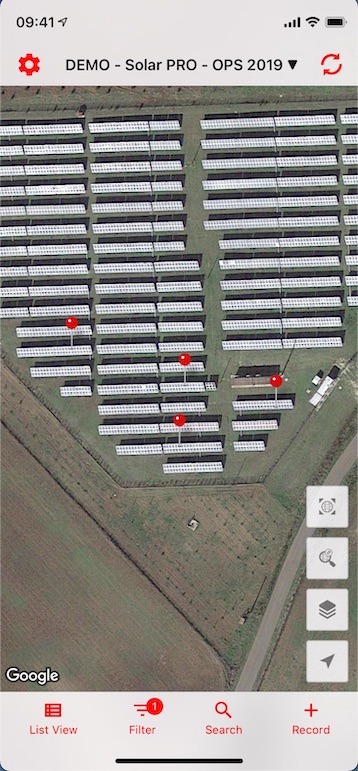
Additionally, using the filter functionality can also be helpful to find the specific records in the field. In the following example we created a filter rule to find the records with the Anomaly Type = Hot Spot.
Map view
Once the record has been located on the map view tab. Tap on the red pin then tap on the record title to open the record in the editor.
List View
Once the record has been located on the list view tab. Tap on the specific record to bring up the edit record screen.
The list view shows all records that have a status of: TODO.
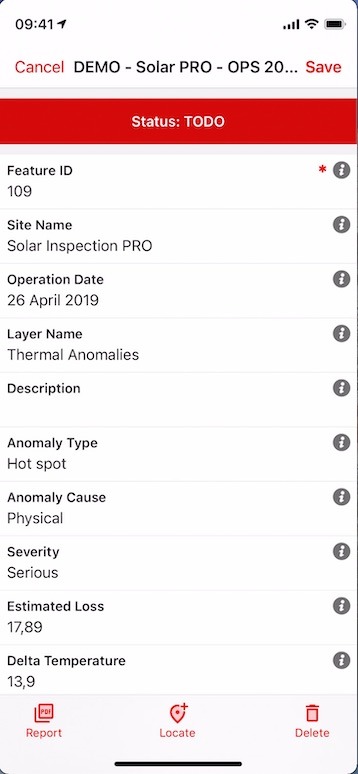
The edit record screen shows the different fields from that record which you can then click on to edit. After you have finished this record in the field, you can change the status of this record to DONE.